

 EU
Internal keyways, splines, and non-circular holes are difficult to machine efficiently. Standard milling cutters and turning tools often need several passes to form these profiles. Sharp internal corners are beyond their reach altogether.
Broaching solves this with a multi-tooth tool whose teeth rise slightly from one to the next. Each tooth removes a thin layer of material, and the full profile is finished in a single pass. This guide is for mechanical engineers, product designers, and procurement managers who want to understand how broaching works and when it is the right manufacturing process for their parts.
What Is Broaching?
Broaching is a machining process that involves removing material with a multi-tooth tool called a broach. In its most common form, known as linear broaching, the broach is pushed or pulled through the workpiece, or across its surface, in a single straight stroke. Milling builds a shape through repeated passes of a rotating cutter. Unlike other machining processes, broaching builds the shape into the tool itself.
Each tooth on the broach stands slightly higher than the one before it and takes a small share of the total cut. Roughing teeth remove most of the material. Semi-finishing teeth bring the feature close to size. Finishing teeth set the final dimensions and surface. Because the profile is fixed in the tool, one broach produces one specific shape.
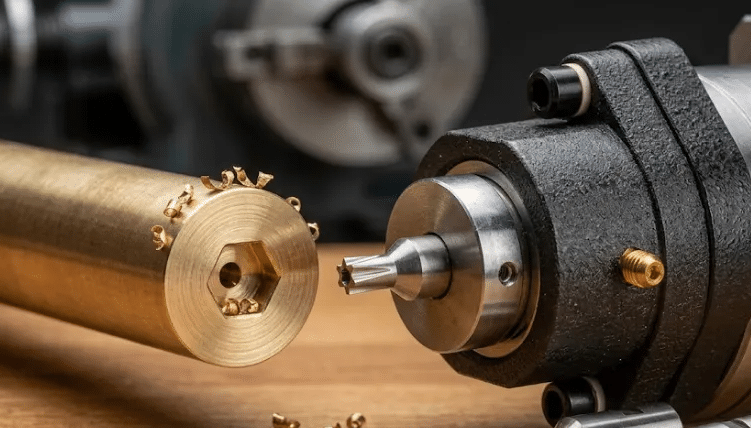
Broaching can create features both inside and outside a part. Internal broaching turns an existing hole into a keyway, spline, square, hexagon, or other profile. External broaching cuts flats, slots, serrations, and contours on the outside of a part. Rotary broaching uses a different motion to form small polygon shapes on lathes and machining centers.
The process dates back to the mid-1800s. Early uses included cutting keyways and rifling gun barrels. Its use expanded in the early 20th century as mass-produced cars created demand for gears and splined shafts.
Key Components of Broaching
A broaching system has four main parts: the broach, the machine, the workholding fixture, and the workpiece. The broach carries the shape. The machine supplies the force. The fixture holds the part in position. The workpiece must be prepared so the broach can cut it cleanly. In all broaching operations, how well these parts match and align determines part accuracy and tool life.
Broach Tool
A broach is a long bar or plate with progressively larger teeth arranged along its length. A typical internal pull broach has a shank that connects to the machine, a front pilot that centers the tool in the starting hole, the cutting teeth, and a rear pilot that supports the tool as it exits.
Broaches are usually named for the shape they cut. Round broaches size round holes, square broaches form square holes, and spline broaches cut internal splines. Some combination broaches carry both round and spline teeth, so the bore and the spline form are cut concentrically in one stroke. Some large round broaches are built as shell broaches, with a replaceable section mounted on an arbor.
The height difference between successive teeth is called the rise per tooth. It sets how much material each tooth removes. Finishing teeth have little or no rise, and several share the same size. This lets the tool hold its dimension as the lead finishing tooth wears.
Tool materials vary with the job. Most broaches are made from high-speed steel, a tool steel chosen for its toughness. Carbide is used for some high-volume work on abrasive materials such as cast iron. Coatings such as titanium nitride help reduce wear.
Cutting Teeth Elements
Within the broach tool, the geometry of the broach teeth is the key to enhancing cutting efficiency, surface quality, and tool life. Five elements define that geometry.
- Tooth Crest: The top edge of the tooth, where the cutting happens. A narrow flat called the land sits behind it and supports the cutting edge.
- Rake Angle (Hook Angle): The angle of the tooth’s cutting face. It controls how the chip forms and affects cutting force. Softer, more ductile materials generally need a larger hook angle than harder or more brittle ones.
- Relief Angle (Clearance Angle): The angle ground behind the crest. It keeps the back of the tooth from rubbing against the freshly cut surface. It is kept small, so each resharpening of the cutting face reduces the tooth size only slightly.
- Pitch: The distance from one tooth to the next. It must keep at least two teeth in the cut at all times for stability, while leaving enough room for the gullet.
- Chip Gullet (Gullet Radius): The curved space between teeth that holds the chip until the tooth leaves the part. The radius shapes how the chip curls. A gullet that is too small lets chips pack in and damage the tool or the surface.
Broaching Machine
The broaching machine supplies steady force to pull or push the broach. Most machines use hydraulic drives, which deliver smooth force over a long stroke. Some use mechanical drives. Vertical broaching machines move the broach up or down and save floor space. Vertical broaching is common for internal work. Horizontal broaching machines move the broach along a horizontal axis and handle longer tools and heavier parts. Small shops often cut keyways on an arbor press. Rotary broaching runs on computer numerical control (CNC) lathes and machining centers with a rotary broach holder. Cutting fluid is applied during the stroke to reduce heat and friction and to flush chips from the teeth.
Workholding Fixture
The fixture locks the part in place during the cut. Broaching generates high cutting forces in one direction. A well-designed fixture resists those forces, prevents the part from deflecting, and keeps it aligned with the broach path. Clamps, vises, and purpose-built holders are all used, depending on the part shape. For internal keyways, a slotted bushing guides the broach inside the bore, and shims set the depth of the cut.
Workpiece
The workpiece is usually a pre-machined part rather than raw stock. Broaching turns it into a finished profile such as a keyway, spline, or polygon. For internal broaching, the starting hole must be sized to fit the broach’s front pilot. A chamfer at the hole entrance helps the tool enter smoothly. The part also needs enough wall thickness to resist the cutting load without deflecting.
Commonly broached materials include carbon and alloy steels, stainless steel, aluminum, brass, and cast iron. Harder workpiece material wears the teeth faster and may need different tooth geometry.
How Broaching Works
Broaching forms a complete feature in a single stroke, but the cutting process depends on what happens before and after that stroke. The steps below follow a typical internal pull broaching cycle. External and push broaching use the same sequence with small differences in how the tool and part are loaded.
Setup and Alignment
For internal work, the starting hole is drilled or bored first and checked for size. If the hole is too small, the first teeth are overloaded. If it is too large, the broach may not center properly.
The workpiece is then placed in the fixture. The front pilot of the broach passes through the starting hole, and the shank locks into the machine’s pulling mechanism. For external work, the part is positioned so the target surface lines up with the broach path.
Alignment is the most important part of setup. The broach axis must run square to the part face. Misalignment can cause the tool to drift, deflect, wear unevenly, or break. Operators also set the stroke length and cutting speed, and confirm that cutting fluid is reaching the cutting zone.
Linear Cutting Stroke
The machine pulls or pushes the broach through or across the workpiece at a steady speed under precise control. The teeth engage in order, from roughing through semi-finishing to finishing. The feature reaches final size as the last teeth pass.
Cutting speeds in broaching are low compared with milling. The large number of teeth makes up for it, because each tooth takes a small, predetermined cut.
A smooth, continuous stroke matters. A pause or change in speed partway through can leave marks on the finished surface. Cutting fluid flows throughout the stroke to control heat and friction.
Tool Exit and Chip Clearance
The feature is complete once the last finishing teeth pass through the part. The rear pilot keeps the broach supported and centered as it exits. A small burr can form on the exit edge of the broached workpiece, so many parts need light deburring afterward.
During the cut, each chip stays trapped in its gullet. The chips are released only after the teeth leave the part. On production machines, cutting fluid flushes most of them away. On manual setups, operators brush the teeth clean after each pass. Chips left in the gullets can scratch the next part or overload a tooth and break it.
Unloading and Reset
After the stroke, the finished part is removed from the fixture. The broach is released from the pulling mechanism and returned to its starting position. On many production machines, this return is automatic, and the next part can be loaded right away.
The first parts in a run are inspected closely. Go/no-go gauges are common for keyways and splines because they check the full profile quickly. Periodic checks continue through the run. When the teeth wear and the feature starts to drift out of tolerance, the broach is resharpened on its cutting faces before production resumes.
Different Types of Broaching
Broaching is classified in a few overlapping ways. Some terms describe where the cut happens, some describe how force is applied, and some describe how the tool or part moves. A single job can fall into more than one category. An internal spline, for example, is usually cut by pull broaching. The right method depends on part geometry, material, and production volume.
Internal Broaching
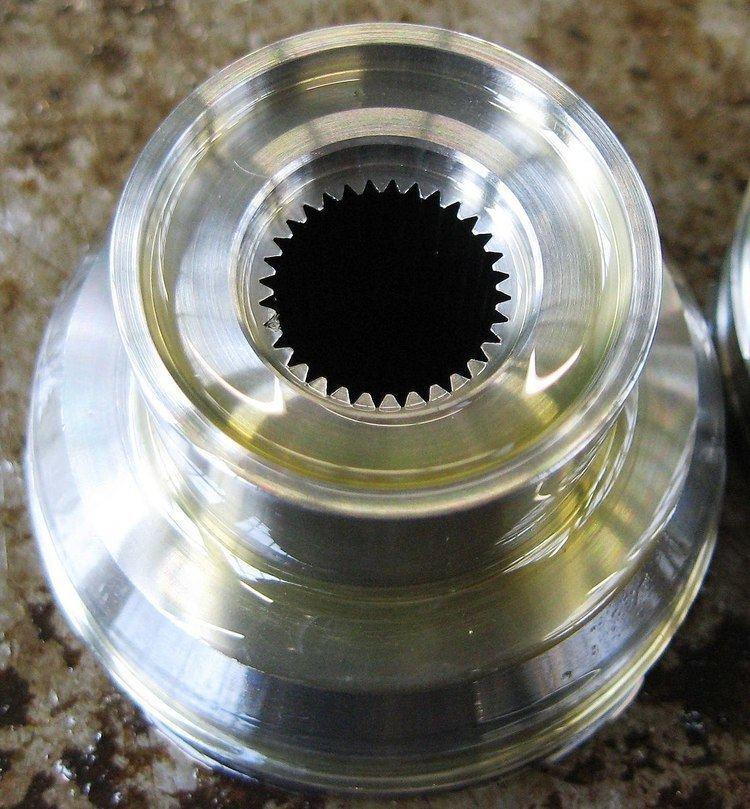
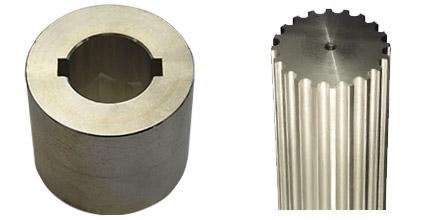
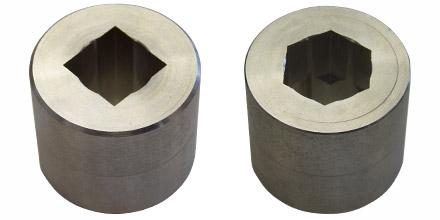
Internal broaching cuts a profile inside an existing hole. The starting hole can be drilled, bored, or cast. The broach enters through it and passes all the way through the part. Common results include keyways, splines, internal gear teeth, square and hexagonal holes, and double-D shapes. Rifling in gun barrels can also be cut this way.
Keyway broaching is the most familiar example. Producing internal keyways in a gear or pulley bore takes only a keyway broach, a slotted bushing, and an arbor press. Larger production jobs such as internal splines run on dedicated broaching machines.
Conventional internal broaching needs a through hole, because the tool has to exit the far side. Blind features call for a different method, such as rotary broaching.
External Broaching (Surface Broaching)
External broaching removes material from the external surface of a part. The broach moves across a flat or contoured face rather than through a hole. It is used for cutting flat surfaces, steps, slots, serrations, contours, and external splines.
Slab broaches cut flat surfaces. Some setups use two slab broaches side by side to machine opposite faces in one stroke. Contour broaches cut curved or irregular external shapes. Surface broaches for large parts are often modular. Separate toothed sections are mounted on one rigid holder, and a worn section can be replaced without replacing the whole tool. Horizontal machines are common for this work because the tools are long and the parts can be heavy. Typical applications include flat faces on connecting rods and fir-tree slots in turbine disks.
A related method called pot broaching cuts external profiles such as gear teeth. The broach stays fixed inside a cylindrical holder, and the part is pushed or pulled through it.
Pull vs. Push Broaching
Pull and push broaching differ in how the machine applies force to the tool.
In pull broaching, the machine grips the front of the broach and draws it through or across the part. The tool is loaded in tension. A tool in tension can be long and slender without bending, so it can carry many teeth and remove more material in a single stroke. Pull broaching is the standard choice for production internal work.
In push broaching, a press forces the tool through the part from behind. The tool is loaded in compression. A long, thin tool under compression tends to buckle, so push broaches are kept short and thick. That limits how much material one broach can remove. Deeper cuts may need several push broaches used in sequence. Push broaching suits keyways, shallow cuts, and light sizing work.
Rotary Broaching
Rotary broaching, also called wobble broaching, forms polygon shapes such as hexes and squares without a dedicated broaching machine. The broach sits in a special holder that tilts it at a small angle, often around one degree, relative to the spindle axis. As the part or holder rotates, the broach rotates with it and appears to wobble. Because of the tilt, only one corner of the tool cuts at any moment. The profile forms progressively as the tool advances into the hole.
The process runs on CNC lathes, milling machines, and screw machines. It is widely used for hex sockets in fasteners, square drives, and small internal splines. It works in both through holes and blind holes, since the tool does not need to exit the far side. The starting hole is drilled slightly larger than the flat-to-flat size of the finished shape, and it needs extra depth to hold the chips.
Continuous Broaching
Continuous broaching reverses the usual setup. The broach stays still, and the parts move past it. Continuous broaching machines mount multiple workpieces on a chain conveyor or a rotating table that carries them past a stationary broach one after another.
Parts are loaded and unloaded while others are being cut, so the machine never stops between cycles. There is no idle return stroke. This makes continuous broaching one of the fastest options for very high volumes of small parts. It is mostly used for flat surfaces, slots, and other simple external features.
Advantages of Broaching
Broaching is not the right process for every part. When the feature and the volume fit, though, it offers a combination of speed, consistency, and finish that few other methods can match.
Efficiency in High Volume Production
A single stroke takes the feature from roughing to final finishing. Milling the same internal spline would take many passes and, in some cases, an indexing setup to cut the spline teeth one space at a time. A milling cutter has to cut and recut. A broach cuts every tooth space at the same time.
Cycle times are short, and loading is simple. Many machines return the tool automatically, and continuous broaching removes the return stroke entirely. That makes the process easy to fit into a high-volume production line.
The main cost sits in the tooling. A custom broach is expensive to design and make, but that cost becomes small once it is spread across a large production run. Labor cost per part stays low as well, because the machine motion is simple and the shape comes from the tool rather than from programming.
Consistent Precision on Every Broached Feature
The geometry of the feature is ground into the tool. Every part passes the same teeth in the same order. There is no toolpath to drift and no indexing error between tooth spaces on a spline. Operator influence on the final shape is small, because no one guides the cutter during the stroke.
Tool wear still happens, but it is gradual and predictable. Periodic gauge checks show when the tool is approaching its limit, well before parts fall outside tight tolerances.
Final accuracy also depends on the setup. Starting hole quality, fixture rigidity, alignment, and material condition all play a part. With those under control, broaching delivers the part-to-part consistency that assembly lines need.
Superior Surface Finish from the Finishing Teeth
The roughing teeth do the heavy work, so the finishing teeth only take very light cuts. This leaves a smooth surface with an even texture. Some broaches for round holes go a step further. They add burnishing sections at the end that smooth and compact the surface without cutting.
Low cutting speed and steady motion also help. The stroke runs at a constant speed with several teeth in contact, which keeps chatter to a minimum. The result is a clean finish that often needs no grinding or polishing afterward.
Long Broach Tool Life
A broach spreads the cutting work over many teeth. Each tooth removes only a thin layer and stays in contact with the part for a short time. Low cutting speeds keep heat down. Together, these factors slow wear on every edge.
When the teeth do dull, the broach can be resharpened on its cutting faces and put back into service. One tool can be reground several times before it is retired. On large surface broaches, worn sections can be replaced individually. This long service life is what allows a single expensive tool to pay for itself over a high-volume run.
Broaching Applications
Broaching appears wherever a part needs a fixed profile made the same way many times. The industries below rely on it most.
Automotive Industry
The automotive industry is one of the largest users of broaching. Transmissions contain many gears and hubs with internal splines, and cutting splines by broaching takes one stroke per part. Synchronizer hubs, gear bores, splined shafts, and drive couplings are common examples.
Surface broaching is also widespread. Steering racks often have their teeth broached. Engine blocks and connecting rods use surface broaching to form flat mating faces. These parts are made in very large numbers, so the tooling cost is spread across long production runs.
Aerospace Engineering
Aerospace parts combine tight requirements with difficult materials. The best-known application is the fir-tree slot in turbine disks. These slots lock the turbine blades in place, and each disk has many of them. Every slot must match the others closely so the blades seat and share load evenly. Broaching produces all of them from the same tool profile.
The disks are usually made from nickel-based superalloys that are hard on cutting tools. Broaches for this work are carefully designed and closely monitored for wear. Aerospace also uses broaching for splined shafts and other components that transmit torque.
Industrial Hardware and Tools
General industrial hardware relies on broaching for everyday features. Gears, pulleys, sprockets, and couplings need keyways to lock onto shafts. Hydraulic pumps and industrial valves use splined and shaped internal features to transmit power and motion.
Hand tools and fasteners are another large group. Sockets and ratchets use square drives. Screws and bolts use hex sockets and other internal drive shapes. Rotary broaching is common here because it can form these shapes in blind holes on standard CNC lathes and screw machines.
Defense and Medical Equipment
Rifling is one of the oldest uses of broaching. The spiral grooves inside a gun barrel spin the bullet for stability and accuracy. Broaching is one traditional method for cutting them.
Medical device makers use broaching for small, precise features. Orthopedic bone screws and implant components often need internal drive sockets, and rotary broaching forms them cleanly in stainless steel and titanium. Surgical instruments use broached slots and profiles as well. Consistent geometry matters here, because instruments and implants must mate with standard drivers every time.
Deciding between broaching and CNC machining depends on your part geometry, tolerances, and production volume. Send your drawings to the engineering team at Aria for a manufacturability review and a quote. They can recommend the most cost-effective way to produce your keyways, splines, and other internal features.
