

 EU

Every machined surface comes off the machine with a surface finish. In machining, surface finish is the texture left on a part after cutting. It includes roughness, waviness and lay, plus tool marks, feed lines and tiny peaks and valleys. That texture affects how the part seals, slides, wears and accepts a coating.
Machining surface finish also gets used to mean two related decisions. One is the machined texture itself, from coarse to fine. The other is the finishing step applied afterward, such as a coating, an added layer or a color.
Engineers, product designers, OEMs and procurement managers who source custom metal or plastic parts feel this directly. Getting either decision wrong drives up cost or creates performance problems. A surface finish that is too tight adds machining time, post-processing and scrap. A surface finish that is too loose leads to leaks, wear, poor fit, friction or corrosion issues.
This guide explains how surface finish is defined and how common Ra levels compare. It also covers where each level is typically used, how finishing methods suit different materials, and how those choices affect part performance and cost.
What is Surface Finish in Machining?
Surface finish is the texture of a part after machining. It affects how the part feels, looks and performs. On a machined surface, it has three components.
Roughness: The fine texture of peaks and valleys left by the cutting tool.
Surface Waviness: A wider, slower variation, usually caused by machine vibration or part deflection.
Lay: The direction of the predominant surface pattern, such as the circular texture pattern left by turning.
Surface finish and surface roughness are not the same thing. Surface roughness is the part of surface finish that can be measured with a single number. Surface finishing refers to a process applied after machining, such as anodizing or polishing. This article keeps the two ideas separate.
Surface finish matters because the surface’s characteristics change how a part behaves.
Friction and Wear: A smoother surface can reduce friction and improve wear resistance. It also improves surface quality for coating.
Corrosion: Rough surfaces trap surface contaminants and give corrosion a place to start, so corrosion resistance drops.
Sealing and Fit: On sealing surfaces, the surface finish decides whether a gasket holds. Flat surfaces and mating surfaces that are too rough wear fast. Rough surfaces also hold moisture, and rough surfaces wear seals faster.
Cost: A tighter surface finish means slower cuts and extra operations. The right value is the loosest one that still delivers the functional performance you need. Optical components and precision components with tight tolerances are the usual exceptions, and quality control checks them closely to give consistent results.
Surface roughness is most often reported as Ra, the roughness average. Ra is the arithmetic average of the height deviations from the mean line, taken over a set sampling length. This roughness average is given in micrometers (µm) or microinches (µin). One micrometer equals about 39.4 microinches.
Surface roughness measurements are taken with a stylus or optical profilometer. The tool traces the surface profile and reports the roughness value. A second surface profile reading confirms the first. A single reading of the roughness value can mislead, so check the part’s surface finish at more than one spot.
Ra is an average roughness, so it can hide isolated surface irregularities such as one deep scratch, because the arithmetic average smooths them out. The number appears next to the surface finish symbols and surface roughness symbols on a drawing. A clear surface finish spec names the Ra value and the unit. Rz and the full conversion chart are covered in Aria’s surface roughness guide.]
Surface Finish Levels (Ra)
Most machined surfaces fall into four common surface finish levels, from 3.2 µm down to 0.4 µm Ra. A smoother surface costs more, because it needs more control, slower finishing passes or a separate operation.
Several things affect surface finish and set how fine the surface texture is. A higher feed rate, a dull cutting edge or poor tool geometry leaves a rougher surface finish and shortens tool life.
A lower feed rate, a sharp cutting tool and a steady spindle speed leave a smooth surface finish and a consistent surface finish across the part. Tool vibration and tool deflection make it worse, and the material properties matter too.
The machining process also matters, and each machining process leaves its own surface texture. The machining method decides how much feed rate and tool geometry can be tuned. Material removal in light finishing passes gives a finer finish, while a heavy cut gives a rougher finish. Uneven material removal leaves peaks and valleys across the surface.
To measure surface roughness on a finished part, compare the reading against these levels. The lists below show what each level looks like, how it is reached, where it is used and what it adds to the price.
3.2 µm: Standard As-Machined Finish
Matte, with visible tool marks across the surface. It equals 125 µin, or grade N8. This is the normal result of milling and turning with a sharp cutting tool at a moderate feed rate, so it adds no finishing cost. It suits brackets, housings, machine frames, general fixtures and hidden faces, where appearance is secondary and a smoother surface adds cost and no value. Move to 1.6 µm only when the face slides, seals or carries a cosmetic finish.
1.6 µm: Moderate Finish
Finer tool marks that are still visible on close inspection. It equals 63 µin, or grade N7. A finishing pass with a controlled feed rate and a sharp cutting edge gives a smoother surface than the standard cut. It suits slow-moving surfaces under light load, such as hydraulic piston rods, slow-speed gearbox parts, precision fasteners and electronic housings. One published comparison from Xometry puts the cost at about 2.5% over a 3.2 µm finish.
0.8 µm: High-Stress Finish
Smooth, with only faint lines. It equals 32 µin, or grade N6. It needs slow finishing passes, rigid tooling and tight process control, and hardened parts may need precision grinding. It suits hydraulic valve components, bearing mating faces and O-ring sealing surfaces. The same comparison puts the cost at about 5% over a 3.2 µm baseline, so use it only on the faces that need it.
0.4 µm: Ultra-Smooth Finish
Very smooth and uniform, close to a mirror finish. It equals 16 µin, or grade N5. Cutting alone rarely reaches this level, so it usually needs grinding with an abrasive wheel, honing or polishing after the cut. It helps reduce friction on high-speed shafts, pneumatic cylinder rods, precision injection molds, optical components and sliding bearings. The same comparison shows 11% to 15% over a 3.2 µm baseline, and ground or polished surfaces can cost more.
Published cost figures vary by supplier, material and part complexity. Use them to compare levels, not as a quote. The best rule is to specify the roughest surface finish that still meets the function, and to call out a finer finish only on the surfaces that need it.
Finishes for a Machined Surface
When the as-cut surface does not meet the need, post-processing closes the gap. These steps sit on top of the machined part.
Some change only the look. Others add a layer, a color or a harder skin to improve surface quality. All of them can shift surface roughness or dimensions slightly.
The finishes below are grouped by what they do. Mechanical finishes change the texture. Coatings and conversion layers add protection or color.
As-Machined
The part comes straight from the machine with minor tool marks. It keeps the tightest dimensional tolerances, so it is the baseline for every other option. Quality control on an as-machined part is simple.
Choose it when appearance does not matter and a smooth surface finish is not required, and the part needs no extra protection.
Bead Blasting
Glass beads fired by compressed air leave tiny surface indentations. These give a uniform matte or satin surface texture and reduce glare.
Best For: Housings, enclosures and visible parts that need an even look.
Watch Out: The process is manual, so the result depends partly on the operator. It removes a small amount of material. Critical features can be masked.
Materials: Works on aluminum, steel, stainless steel and most plastics. Softer metals show the blast pattern more.
Brushing
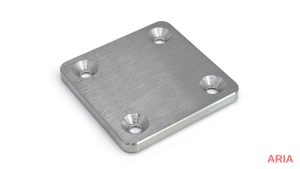
Abrasive brushes or pads leave fine directional lines for a satin surface finish. The lines hide small scratches and tool marks, so the machined surface looks smoother.
Best For: Panels, covers and decorative faces on aluminum and stainless steel.
Watch Out: The direction of the lines should be stated on the drawing, or each batch may look different.
Materials: Aluminum and stainless steel take a clean, even grain.
Polishing
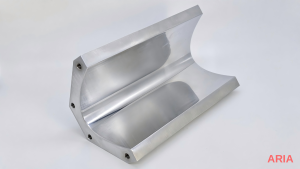
Progressively finer abrasives or buffing wheels, removing material in small steps, lower Ra and give a bright, reflective surface. Polishing can reach a mirror finish and improves light reflection. A mirror finish and a finer finish both depend on the starting surface. A mirror finish is mostly cosmetic.
Best For: Cosmetic parts, reflectors and sealing faces that need a very low Ra.
Watch Out: It works by removing material, so it can move dimensions and soften sharp edges. It is slow, so it adds cost.
Materials: Stainless steel, aluminum, brass and copper polish well. Cast or porous material leaves pits that polishing cannot hide.
Anodizing Type II
Forms a thin oxide layer on aluminum and titanium. Typical thickness is about 4 to 12 µm.
It gives good corrosion resistance and accepts dye, so it is the usual route to colored aluminum parts.
Best For: Consumer products, enclosures, brackets and cosmetic parts.
Watch Out: Wear resistance is limited. The layer grows into and out of the surface, so it changes dimensions slightly.
Color Options: Clear, black, red, blue, gold and more. Dark colors and clear are the most consistent between batches.
Anodizing Type III
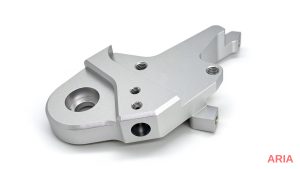
Also called hardcoat. The layer is thicker, typically about 50 µm, and much harder.
It offers higher wear resistance and corrosion resistance, but tighter process control makes it more expensive.
Best For: Sliding parts, tooling, fixtures and parts that see abrasion.
Watch Out: The thick layer adds noticeable size to each surface. Plan the tolerance before machining, not after.
Color Options: Usually a dark gray to black tone. Dye options are limited compared with Type II.
Powder Coating
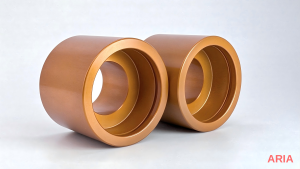
A dry polymer powder sprayed electrostatically and cured in an oven. It works on most metals that can survive the curing temperature.
Typical thickness is about 18 to 72 µm. It resists impact well and comes in many colors.
Best For: Outdoor equipment, frames, covers and parts that need strong color and impact resistance.
Watch Out: It is hard to apply inside holes and cavities. The layer is thick, so threads and tight fits need masking.
Color Options: A wide range of colors and gloss levels, from matte to glossy.
Black Oxide
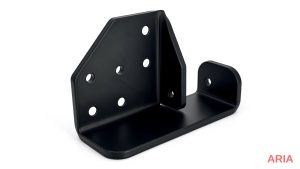
A thin iron oxide conversion layer for steel and stainless steel. It reduces glare and gives a smoother surface finish to the eye.
Sealed with oil or wax, it improves corrosion resistance and helps reduce friction. It adds very little thickness.
Best For: Fasteners, tools, gears and steel parts with tight tolerances.
Watch Out: Protection is mild. Parts used outdoors or in damp air need a stronger finish.
Color Options: Black only.
Electroless Nickel Plating
Adds a uniform nickel-phosphorus layer without electric current. The layer follows the shape of the part, even in recesses and bores.
It improves hardness and corrosion protection.
Best For: Complex shapes, internal features and parts that need both wear and corrosion protection.
Watch Out: It adds thickness, so critical dimensions must allow for it.
Materials: Steel, stainless steel, aluminum and copper alloys.
Passivation and Electropolishing
Chemical or electrochemical treatments for stainless steel. They change surface properties without adding a thick layer.
Passivation: Removes surface contaminants such as free iron and restores corrosion resistance. It does not add a coating, and the part looks the same afterward.
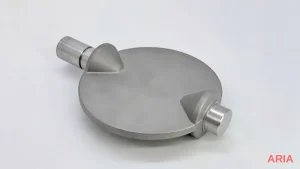
Electropolishing: Removes a thin layer of metal electrochemically. It smooths the microscopic peaks, gives a smoother finish and leaves a bright, clean surface.
Which Finish Suits Which Material
The material often decides the finish before the look does.
Aluminum: Anodizing Type II or III, bead blasting, brushing and a powder coat.
Steel: Black oxide, powder coating and electroless nickel plating. Bare steel rusts, so it needs one of these.
Stainless Steel: Passivation, electropolishing, bead blasting and brushing.
Titanium: Anodizing Type II.
Brass and Copper: Polishing, bead blasting and electroless nickel plating.
Combining Finishes
Finishes are often stacked. The first step sets the base texture, and the second adds protection or color.
Bead Blasting Then Anodizing: Gives a uniform matte color and adds corrosion resistance. It is common on aluminum housings.
Polishing Then Plating: A smooth base gives a smoother plated surface. Plating copies the surface underneath, so flaws show through.
Machining Then Passivation: Keeps the machined surface unchanged and restores corrosion resistance on stainless steel.
How Post-Processing Changes Ra and Dimensions of a Machined Surface
Every finish changes the part a little, including its surface roughness. Check that the finished part still meets the desired surface finish. The change matters for tight fits, fine threads and sealing surfaces.
Effect on Ra: Bead blasting and anodizing change the surface texture slightly. Polishing lowers Ra and gives a smoother finish. If the value is critical, check it after finishing and not before. If a drawing calls out specific values, recheck the roughness parameters after finishing.
Other Roughness Measures: RMS, also called Rq, squares the height deviations, averages them and takes the square root. It is more sensitive to large peaks and valleys than Ra. Waviness evaluation looks at broader spacing and height patterns, so it filters out the finer details captured in roughness measurements.
In-Process Monitoring: In high-volume work, in process methods such as in-line profilometers or CNC-integrated sensors can monitor roughness during production. Final verification is still often done afterward.
Effect on Dimensions: Coatings add thickness. Anodizing grows about half outward and half inward, so a 50 µm coating adds about 25 µm to each surface. A 1.00 mm cylinder ends up near 1.05 mm. Polishing and blasting remove a small amount of material.
Masking Areas: Threads, press-fit bores, sealing surfaces and electrical contact points should be masked before coating.
A drawing that lists the Ra value, the finishing process and the masked areas leaves little room for error.
Hard-to-machine features, such as complex shapes or deep cavities, may be produced by electrical discharge machining. Those surfaces still need the specified check.
Aria machines custom parts with a range of surface finishes. Upload a drawing with the surface finish noted to get a quote.
