Pad Printing Finish: Process, Types, Benefits and Uses

HomeBlog >

Pad Printing Finish: Process, Types, Benefits and Uses

Do you have bespoke images you want imprinted on a surface and wondering if to go for pad or screen printing

Today I share with you a step-by-step guide to pad printing, and talk about its benefits and uses in 2023. Ready? Let’s dive in. 

What is Pad Printing?

pad printing plastic parts

Pad printing is a printing process that involves transfer of a 2-D image engraved on a metal or plastic plate onto 3-D surfaces. With pad printing you can stamp images on hollow and curved surfaces, something you can’t do with conventional printing. 

Materials and Components of Pad Printing Process

Pad printing can be used in small and large-volume productions. It is an inexpensive printing technique that can work with a wide variety of surfaces and almost any object shape. The printing setup is one of the simplest and requires just a few important components and materials.

  • Pad printing ink
  • Solvents
  • Hardeners
  • Pad print ink cup
  • Pad printing plate
  • Silicon pad
  • Pad printer

Pad printing inks

ink

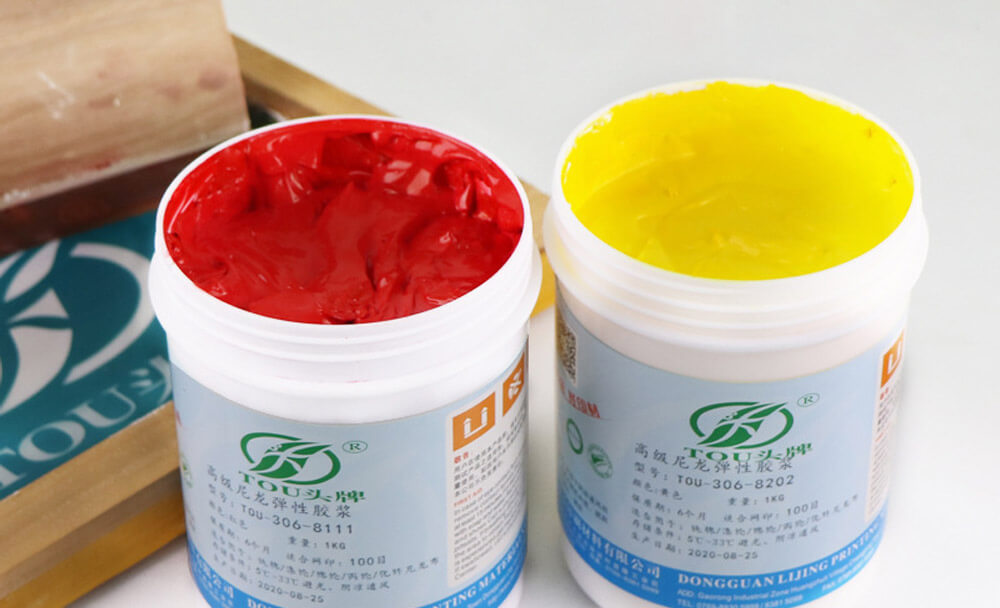
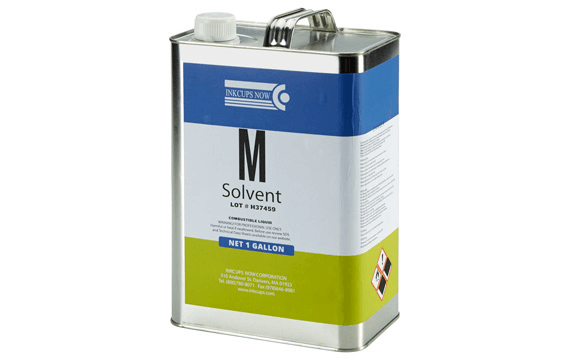
Printing ink is a viscous liquid or paste that contains pigments or dyes, binders, solvents, and additives, used in various printing processes to transfer images, text, or designs onto surfaces such as fabric, plastic, or metal parts.

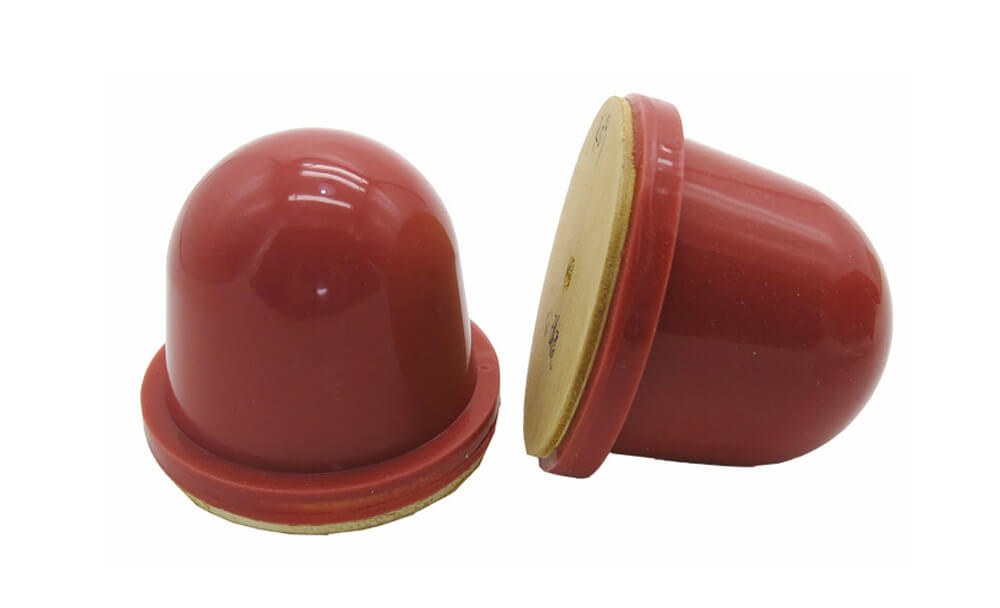
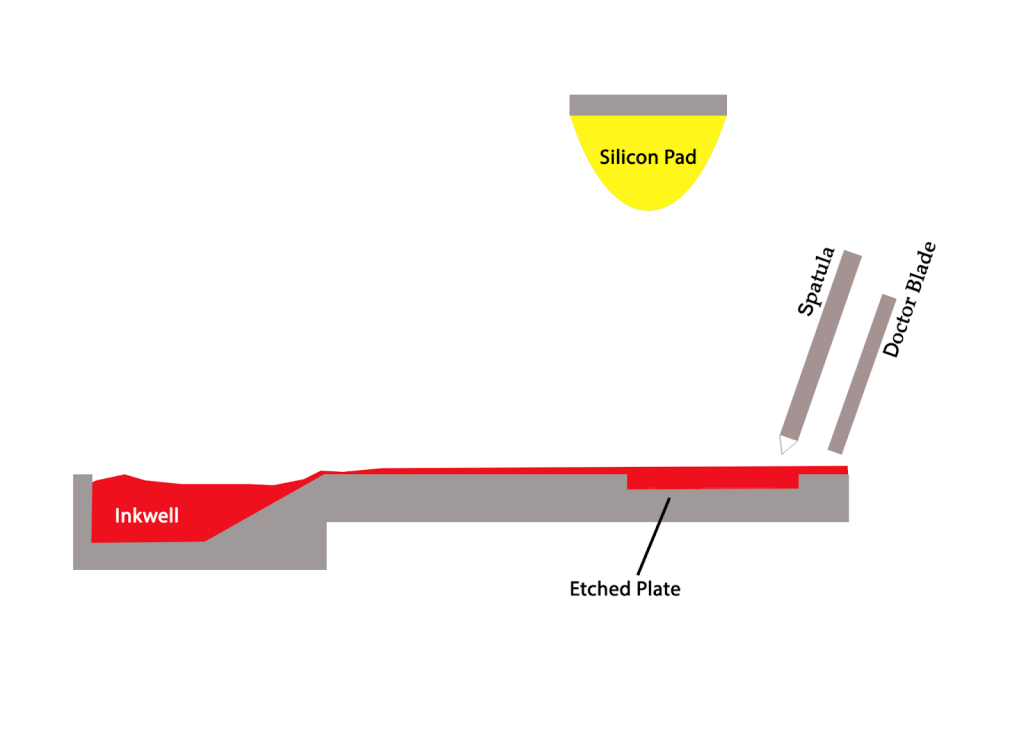
The ink is specially formulated to adhere to the silicone pad, transfer easily onto the product or substrate, and produce a durable, high-quality print.

There are three common types of inks that are used for multiple applications.

Single component ink

In a single-component ink, you never use a hardener.

Two-component ink

In a two-component ink, you always have to add a hardener.

P-type ink

P-type inks can be used with or without the hardener.

There are essentially just three ingredients to the pad ink recipe. Take your ink, in this case, P-type ink, and add hardener (catalyst) usually in a 4:1 ratio depending on the object’s surface and finally add solvent to adjust the viscosity of your whole ink mixture.

(For medical products, you have to use ink that complies with USP Class VI or is biocompatible in nature. An example of this would be pad-printed syringes and cannulas.)

Printing inks are available in a wide range of colors and shades, including:

  1. Standard colors: These are the most common colors used in pad printing, such as black, white, red, blue, yellow, green, etc. They are suitable for a wide range of printing applications.

  2. Metallic colors: Metallic inks contain metallic pigments and are used to create a shiny or reflective effect. They are often used in the printing of logos, brand names, and other decorative elements on consumer products.

  3. Fluorescent colors: Fluorescent inks are bright and highly visible under ultraviolet (UV) light. They are used to create eye-catching designs on products like safety signs, promotional items, and packaging.

  4. Pantone matching system (PMS) colors: PMS is a standardized color matching system used in the printing industry. Pad printing inks can be formulated to match specific PMS colors, allowing for precise color matching across different printing processes and substrates.

  5. Custom colors: Pad printing inks can also be custom-formulated to match specific color requirements. This allows for greater flexibility in creating unique and custom designs.

Solvents

Solvents

Solvents are added to pad printing ink to adjust its viscosity and aid ink transfer from the etched plate to the silicon pad. Two types of solvents are available: fast-evaporating for cold environments, and slow-evaporating with a larger oil content for warmer environments.

Consistency in solvent selection is crucial, as it is matched with the ink set up of the supplier to ensure identical ink compositions next print cycle. Slow-evaporating solvents result in more opaque prints, but with longer drying times.

Hardeners

Hardeners are additives used in pad printing ink to increase durability and enhance physical characteristics, such as abrasion resistance and chemical resistance to water, cleaning agents, and weather elements.

They also function as curing agents, but the pot life of the ink is limited to a few hours after the hardener is added.

Care must be taken to use the hardener in low humidity environments to prevent unwanted secondary reactions.

Hardeners are particularly useful for printing images on hard surfaces such as ABS plastic, medical equipment, and metals. Instructions on the appropriate amount and type of hardener are typically included with the purchase of the ink.

Pad print ink cup

Pad Print Ink Cup

A pad printing ink cup is a component of a pad printing machine that holds the ink used in the printing process. It is typically made of ceramic, steel or plastic and is designed to fit onto the printing machine’s ink well.

The ink cup is a sealed container that holds a certain amount of ink and is designed to deliver a consistent and precise amount of ink to the printing plate during each cycle of the printing process. The ink cup rotates and picks up ink from the well, which is then transferred onto the printing plate through a doctor blade that removes excess ink.

Pad Printing Plate

printing plates

Pad printing plate or cliche is the most essential part of the pad printer. It holds the design image you plan to reproduce on the final object using the silicon pad. The material and quality of pad printing plates directly affect the print on the object. These plates are made from a host of metals and the best plates are made from cobalt and steel, while others are made from polymers.

Silicon pad

printing pad

Pads are the stamping units that transfer the ink from the plate to the object. They are typically made of silicon and there isn’t much variety when it comes to the material of the pad.

Printing pads can be as small as a few centimeters or as large as a few meters. They are shaped in circles, boxes and can be easily molded into custom shapes. Pads can have varying properties, like durability, hardness, compressibility, etc. all of which are useful when deciding which pad to use for a specific ink or object.

Pad Printers

There are several types of pad printers, including:

  1. Manual pad printers: These are the simplest and most affordable type of pad printers. The operator manually loads and unloads the substrate and moves the pad and printing plate between cycles.

  2. Semi-automatic pad printers: These pad printers automate some aspects of the printing process, such as moving the pad and plate, but still require manual substrate loading and unloading.

  3. Automatic pad printers: These are fully automated pad printers that use robotic systems to load and unload substrates, move the pad and plate, and control the printing process. They are ideal for high-volume production.

  4. Shuttle pad printers: These pad printers have a shuttle mechanism that moves the substrate between the printing station and a loading/unloading station, allowing for continuous printing.

  5. Rotary pad printers: These pad printers have a rotary table that rotates the substrate between multiple printing stations, allowing for multi-color printing.

  6. Ink cup pad printers: These pad printers use an ink cup to contain and transfer ink to the printing pad, reducing ink waste and allowing for clean and efficient printing.

Types of Pad Printing and Their Process Steps

Pad printing was first initiated decades ago, and one of the reasons it’s so popular is the evolution of pad printing. Today there are three main categories of pad printing equipment that allow you to print on any oddly shaped surface.

Open Inkwell

Open Inkwell pad printing is a less sophisticated pad printing operation. It is a cheap pad printing technology, This gives you more manual control over the pad printing process and is the cheapest pad printing available.

Open Inkwell as the name suggests has an exposed ink well sitting just behind the cliché. Ink is poured into this tiny reservoir and the pad printer is set up for printing. A spatula is used to spread the ink on the cliché and just a few centimeters away on the other side is a doctor blade that is used to remove any excess ink from the printing plate. After this, the silicon pad is pressed onto the cavity that holds the ink and moved forward and pressed onto the object where the ink attaches itself. 

The process can be best described with the aid of a few steps.

  • Step 1: The spatula moves from the inkwell toward the front of the plate. Covering the entire cliché with ink. 
  • Step 2: The spatula and doctor blade move backward to the inkwell. The doctor blade removes any excess ink on the printing plate and ink remains in the etched engraving or cliché. This is because the engraving has a depth of a few microns from the surface of the plate. 
  • Step 3: The upper layer of the ink inside the engraving contacts the air and the solvent used in the ink evaporates leaving a tacky layer of ink on the surface. The silicon pad positions itself above the cliché and is pressed into the image. The tacky surface ink allows it to adhere to the silicon pad. 
  • Step 4: The pad is raised and the bottom layer of ink on the pad again comes into contact with air and becomes tacky. To stick on the substrate when the pad is pressed against it. 
  • Step 5: The pad moves forward towards the object and the spatula moves with it to spread a new layer of ink on the printing plate. The entire process is repeated and within seconds, prints are done on many units.

Closed Ink cup

The closed Ink cup has a similar working principle to the open inkwell pad printing, except the ink is not exposed to open air. Ink is contained in a magnetic cup, that has sharp circular edges. The cup latches on to the printing plate and moves forward and backward to fill the cliché with ink. 

  • Step 1: A printing plate with an etched image is attached to the inkcup. 
  • Step 2: The silicon pad and the inkcup move forward to deposit a layer of ink onto the cliché. The image cavity is filled with ink. 
  • Step 3: Silicon pad and the entire inkcup will move backward. The inkcup’s sharp edges will remove any excess ink on the printing pad during this motion. The only ink left behind is in the cavity and exposed to air, where the upper layer of this ink becomes tacky. 
  • Step 4: The silicon pad is lowered onto the plate and the ink sticks to the pad. The silicon pad is then raised, allowing the bottom layer of the ink to become tacky. 
  • Step 5: Finally, the silicon pad moves forward where the object is placed. Because the silicon pad and inkcup are controlled by a single lateral moving unit, the inkcup also moves forward and deposits ink into the image cavity. 

Rotary Gravure

A rotary gravure is simply a rotating gravure cylinder that is used in a printing method. A large ink reservoir is placed below the cylinder and the gravure cylinder has image cavities depending on the design you intend to produce. The cylinder rotates and collects ink from the reservoir on its surface.

A fixed doctor blade is used to wipe the cylinder surface and remove excess ink. The only ink present as the cylinder circles to the top is the ink in the image cavity. At the top, another cylinder is present which rotates to pass the substrate film and provides pressure to get the impression of the ink cavity on the object. 

Benefit of Pad Printing

pad printing

Here are some of the benefits you can get flat printing plate and from pad printing.

  • Pad printing designs are remarkably customizable. For object traceability or sheer branding.
  • High in quality and of exceptional resolution.
  • Laser-plate images are precise and highly repeatable.
  • Depending on the type of ink solvent used pad printing can be waterproof.
  • Pad printing allows use of diverse ink compositions e.g. RGB, CMYK and RAL. You can have as many colors in a single design as the number of ink cups.
  • Pad printing is relatively cost-effective compared to other printing methods like screen printing

What material parts can be pad printed?

Pad printing finish is extremely popular not only because the small amount of ink, its efficiency and simple set up, but also because of the ink’s ability to adapt to different surfaces. You can essentially use a few additives, and hardeners and change the composition of the ink to suit metals, plastics, and ceramics of all kinds.

Document
Plastic Metals Other Materials
ABS Aluminum Cellulose acetate
ASA Chromium-plated surfaces Cotton
PVC Gold-plated surfaces Leather
Resins Nickel-plated surfaces Paper
Acrylic Stainless Steel Rubber
Polyacetal Brass Ceramics
Polyamide (PA) Copper Glass
Polycarbonate (PC) Zinc Wood
Polyester (PES) Iron
Polystyrene (PS) Steel
Polyurethane (PU) Bronze
Polyxpropylene (PP)

Applications  of Pad Printing

Electronics

Screen printing parts

Pad printing is commonly used to mark components in the electronics industry, such as buttons, switches, and circuit boards.

Medical devices

It is used to print identification and branding on medical devices like syringes, catheters, and surgical instruments.

Automotive

It is used to print logos, labels, and branding on automotive parts like dashboards, steering wheels, and gear knobs.

Toys

Pad printing is used to print branding and designs on toys like action figures, board games, and puzzles.

Cosmetics

It is used to print branding and logos on cosmetics packaging like lipstick tubes and compact cases.

Promotional products

It is used to print branding and logos on promotional products like pens, keychains, and stress balls.

Sport equipment

Pad printing is used to print logos, branding, and numbers on sports equipment like golf balls, tennis balls, and hockey sticks.

  1. Manual pad printers: These are the simplest and most affordable type of pad printers. The operator manually loads and unloads the substrate and moves the pad and printing plate between cycles.

  2. Semi-automatic pad printers: These pad printers automate some aspects of the printing process, such as moving the pad and plate, but still require manual substrate loading and unloading.

  3. Automatic pad printers: These are fully automated pad printers that use robotic systems to load and unload substrates, move the pad and plate, and control the printing process. They are ideal for high-volume production.

  4. Shuttle pad printers: These pad printers have a shuttle mechanism that moves the substrate between the printing station and a loading/unloading station, allowing for continuous printing.

  5. Rotary pad printers: These pad printers have a rotary table that rotates the substrate between multiple printing stations, allowing for multi-color printing.

  6. Ink cup pad printers: These pad printers use an ink cup to contain and transfer ink to the printing pad, reducing ink waste and allowing for clean and efficient printing.

Tips for Successful Pad Printing

Choose the right ink

Use high-quality ink that is appropriate for the surface you are printing on. The ink should be able to adhere well to the surface and dry quickly. For multicolored images go for pad printing machines with as many ink cups.

Use the right pad

Select the right size and shape of pad that matches the size of your design and the contour of the product. The pad should also be made from high-quality silicone material that can transfer the ink smoothly.

Control the ink viscosity

Keep the ink viscosity consistent throughout the printing process to ensure uniform ink transfer. Use a viscosity cup to measure the ink’s thickness and adjust it as necessary.

Maintain the equipment

Regularly clean and maintain the pad printing machine, including the ink cup and the doctor blade, to ensure optimal performance and extend the life of the machine.

Control the printing environment

Control the temperature, humidity, and cleanliness of the printing environment to minimize any factors that could affect the ink transfer.

Use proper printing techniques

Use computerized laser-plate making to etch the design and technique, such as the correct angle and pressure, to ensure that the ink is transferred evenly and consistently onto the product.

Conduct regular quality control

Conduct regular quality control checks to ensure that the prints meet the required standards, and adjust the printing parameters as necessary.

Pad Printing vs. Screen Printing, What is the Difference?

Spot Color Screen Printing

Pad printing finish is sometimes mistaken for screen ink blocking stencil printing. But the two are quite different. Screen printing in a printing process involving pushing ink through a mesh onto an object to create an image. The mesh screen of a stencil allows ink through at the same time blocking passage of ink to undesired parts transfer the image.

pad printing is ideal for printing high-resolution images on irregular surfaces, while screen printing is better suited for flat surfaces and larger designs with less detail. The choice between the two depends on the specific requirements of the printing project.

Author

Gavin Leo is a technical writer at Aria with 8 years of experience in Engineering, He proficient in machining characteristics and surface finish process of various materials. and participated in the development of more than 100complex injection molding and CNC machining projects. He is passionate about sharing his knowledge and experience.